
Purchasing replacements for your trailer is not always straightforward. Often, you have no idea what a certain part is called, and you certainly have no idea the type or size you require.
Leaf springs provide much-needed buffering against shocks and tremors in your travel trailer, but they are not universal. Different vehicles require leaf springs of varying sorts and sizes. When the incorrect leaf spring is used, your car is left defenseless and misaligned. Before you can repair your leaf springs, you must first measure them to determine the type of replacement part you require.
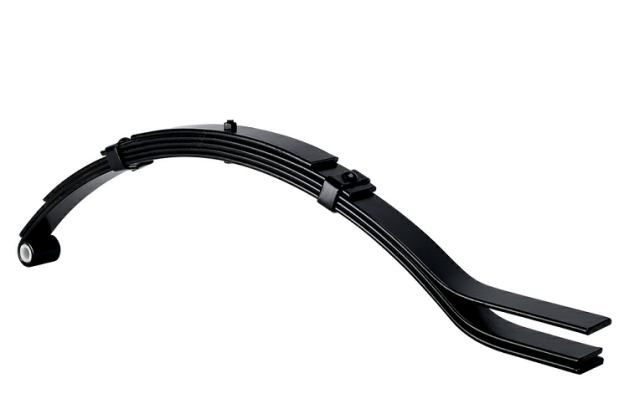
This article will teach you everything you need to understand about changing the leaf springs on a trailer.
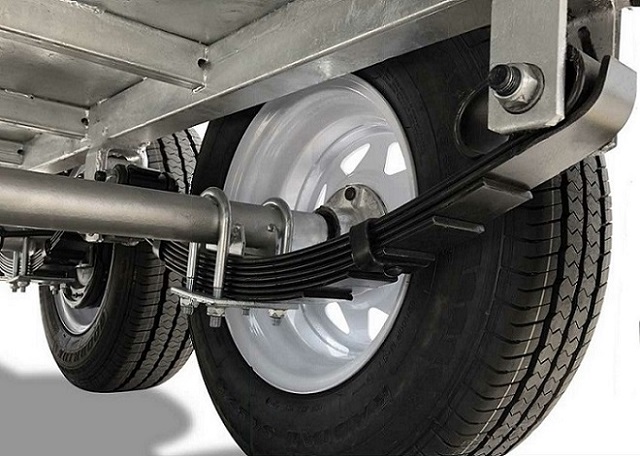
First, one must realize that trailer leaf springs must be chosen according to the trailer axle weight rating, spring type (Slipper or double-eye), length, and breadth parameters. Axles are typically marked with a sticker or plate indicating their weight rating.
It is critical to keep a few points in mind regarding replacement springs. When springs are still placed in the trailer suspension, they will not have their true static sizes. For correct measurement, it’s best to remove the spring because the leaf spring seems to stretch over time. After several years of heavy use, a leaf spring may flatten significantly and “grow” up to 1/2- to 3/4-inch. As a result, an initially 25-1/4 inches spring may now size closer to 26 inches.
Sourcing: https://bit.ly/3F3L23Y
Moving on, another very important thing you must know is that there are five distinct leaf spring varieties, which fall into two broad categories (as mentioned before): double eye leaf springs and slipper springs.
1. When Should Trailer Leaf Springs Be Replaced
2. Trailer Leaf Springs Size And Axle Capacity
3. How To Choose The Right Replacement Trailer Leaf Springs
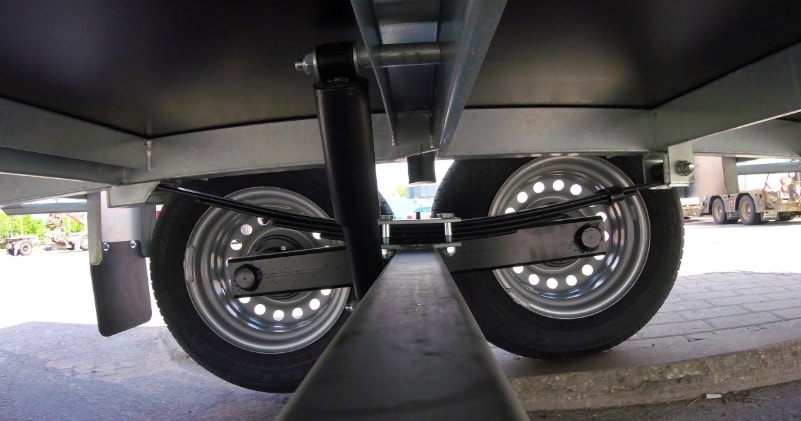
Weather, aging, and excessive weight can all degrade your springs with time. At a minimum, check your trailer’s leaf springs every 12,000 miles or if you observe drooping, corrosion, fractures, or rough riding. While inspecting, keep the following in mind:
Sourcing: https://bit.ly/3qwrqBl
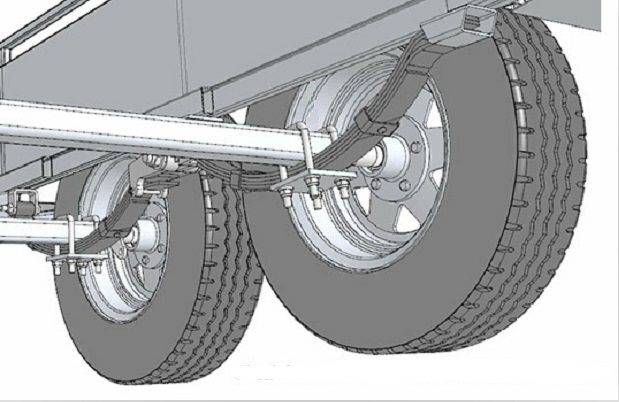
The leaf spring’s middle bolt is referred to as the center point. The majority of leaf springs have two eyes at every end, where the bushings are located. Certain leaf springs are equipped with hooks or flat ends. Calculate the correct spring size for your replacement by following these steps:
Sopurce: https://bit.ly/30fMHnO
Always install your trailer springs in sets to provide an even load distribution. Consider your axle capacity, the number of leaves on your current springs, and the kind and size of your springs when selecting a replacement.
The Capacity of The Axles: The capacity limit of most trailer axles is indicated on a label or plate, but you can also consult your owner’s handbook. Certain manufacturers’ websites may additionally include information about individual axles.
Number of Leaves: While measuring the spring, keep track of how many leaves it has. Hence the more leaves it has, the more stable it is — however, too many leaves will result in an overly rigid frame. Leaf springs are usually mono-leaf, consisting of a single leaf, or multi-leaf, consisting of multiple layers with clips between every layer. No holes should exist between multi-leaf springs.
Spring Dimensions and Type: Determine the type of leaf spring you’re working with once you’ve removed it. Trailer springs come in a variety of configurations.
Double-eye springs with both eyes open, and Slipper springs with one open eye, Radius-ended slipper springs, With flat end slipper springs, and Spring slippers with a hook end
In some circumstances, replacing the bushings may be sufficient if the springs remain intact and are not buckling, rusted, or extended.
Because the existing leaves may be slightly rusted, removing them without harming any surrounding pieces utilized once the old leaves are replaced critical. Thus, before extracting leaf springs, prepare the stabilization system for the operation at hand three days in advance.
Rub lubricant around the bolts, nuts, and brackets to loosen the suspension system in readiness for the upcoming springs.
Set chocks at the front of the trailer’s front tires when it is stopped in an optimal working location to stop the trailer from moving forward. Loosen the rear-wheel lug nuts. Elevate the trailer’s rear end at least three inches with a hydraulic jack and secure it with a jack brace underneath the rear axle.
Undo the unfastened lug nuts and slip off the rear wheels while the trailer is hung at the rear. You should then have direct exposure to both rear leaf springs.
This step teaches you how to detach leaf springs. Find and disconnect the lower mounting stud, bolts, and shock absorbers. Remove the U-bolt nuts and the base plate. Raise the axle moderately and remove the leaf spring load from the center pin using a pry bar.
Loosen the bolt from the forward mount of the spring and place the spring’s front aside. Disconnect the spring’s rear screws and the outer plate. Release the shackle ring and shackle. The following next two stages will teach you how to install leaf springs properly.
Install the replacement shackle using the installation kit. Insert the inner-shackle pivot pin through the shackle’s metal sleeve. Ascertain that the leaf spring is properly positioned. Bear in mind that the distance between the middle and the end will vary on each side.
Place the rear leaf spring on the shackle, precisely aligned, and fasten it with latching nuts, but not too firmly. This time, use new screws, as the old screws may be worn.
After securing the back of the new leaf spring in its proper location, it’s time to finish the installation. Raise the leaf spring’s front end to a position between the front mounts. Secure the bolt with the securing nut, but only lightly. The spring pack is not yet prepared for tightening.
Bring the back end down until it comes into contact with the spring and aligns the center. Install the replacement U-bolts that arrived with your replacement kit. The component is now complete and ready for tightening. Securing the nuts and bolts using a torque wrench is critical. Reevaluate the nuts and bolts after approximately seven days to ensure they are securely fastened.
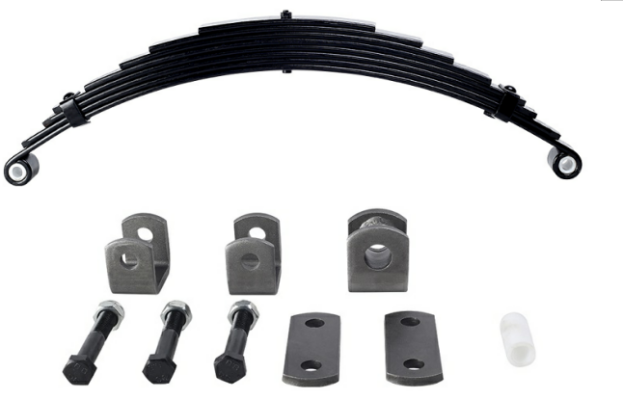
Reapply the shock springs with the torque wrench in hand.
After completing one side’s leaf spring installation, repeat these instructions on the opposite side. After replacing the trailer’s leaf springs, reinstall the rear wheels and tighten the lug nuts on every side. Extract the jack stand from underneath the trailer and lower the rear to the ground. Check the lug nuts one more time to make sure they are securely fastened.
In conclusion, now that you know how to replace leaf springs, future leaf spring installation chores will almost certainly be much easier.
The importance of having a road-worthy trailer cannot be overemphasized. After learning about the varieties of leaf springs, you can choose the suitable style and measure for the proper replacement. The number of leaves and the spring’s maximum weight are also quite useful to know.
Our trailer parts expert will answer your inquiries within 12 hours.

Tow-Max is a trusted supplier of trailer parts in China, known for its huge variety of products and one-stop services. We have been supplying customers from Australia, South America, the USA, and the Middle East. Our business partners are located in Sydney, Melbourne, Adelaide, Mexico City, Dubai, etc.
No.163-1, Shang yang Road, Dongqian Lake Industrial Zone, Ningbo, 315121, Zhejiang, China
+86-574-8786-2718
+86-574-8786-2717
sales(at)soaringtrailerparts.com
©Copyright 2020. Tow-Max. All rights reserved. Powered by MML.